
The Resourceful Sailor Makes a Strong Point
Long have the how-to pros like Don Casey preached the gospel of lining your fastener holes in wooden and foam-core decks and transoms with epoxy, to prevent water intrusion in case (or when) the sealants fail. I’ve followed their advice and techniques since my early boat-repair and -modification days. Filling holes with epoxy and not creating voids had its challenges. Even harder still was re-drilling the holes precisely where they needed to be, especially with multiple fasteners. I would often have to oversize the re-drills to get them to fit, risking thinning the walls of the epoxy I applied, thus potentially reducing its integrity. More than once, I felt it necessary to start over.
Then, through the local grapevine, I was introduced to a different approach to the same idea that addressed both difficulties mentioned above. This approach does not invalidate what the how-to pros have written about many times before. It only adds an amendment. In view of this, I will avoid excessive repetition and focus on the particulars, assuming you have researched (or will) the long-established best practices of epoxy-lining holes.
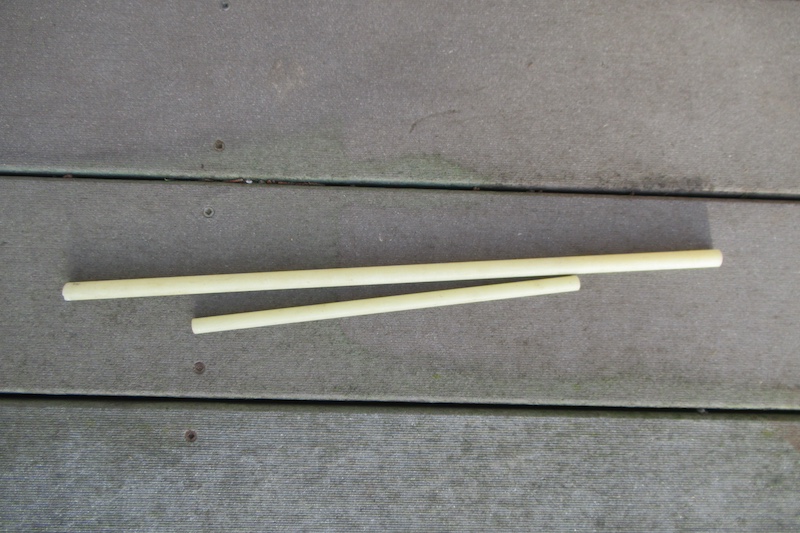
This Resourceful Sailor installment involves the use of G-10 tubes. G-10 is epoxy and fiberglass laminate cured under high pressure. It comes in various inner diameters and outside wall thicknesses. I’ve gotten mine from the handy online industrial supply store McMaster-Carr, but there are probably other vendors. Now, down to business.
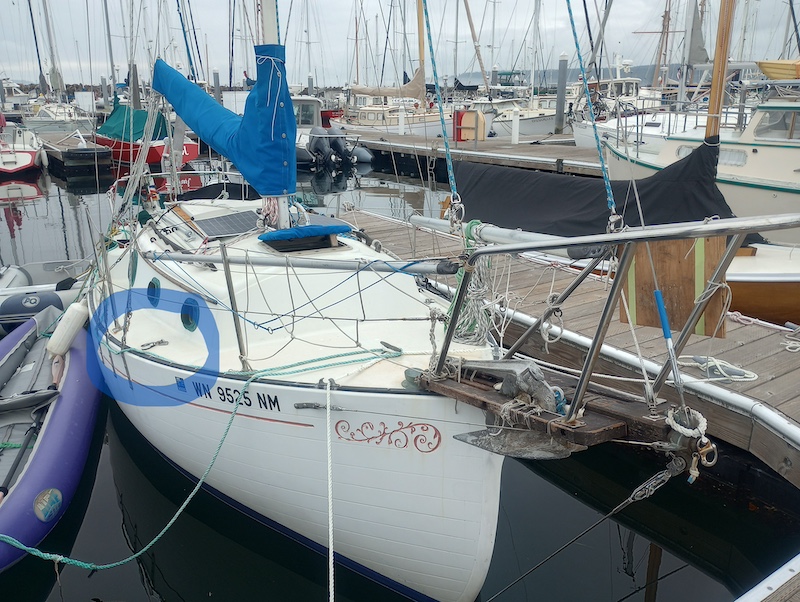
A new storm jib for Sampaguita, a 1985 Pacific Seacraft Flicka 20, required blocks she didn’t have for proper leads and sail trim. Two strong points on each side of the deck were needed, and I was determined to retain Sampaguita’s “non-leaky” deck.
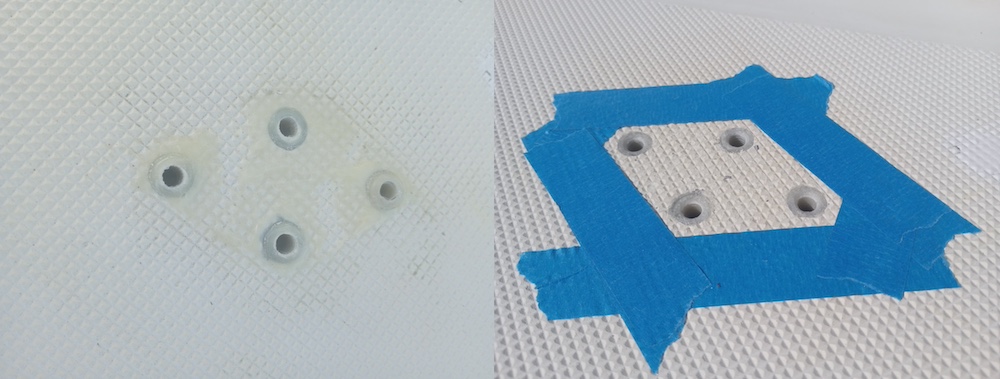
The diamond-shaped eye plates I would use required four 1/4-inch fasteners each, bolted through the deck. I determined the placement and mapped the plates’ holes. I drilled them oversized (1/2-inch) and prepped them as the how-to pros have written about many times before. I cut four small pieces of G-10 (1/4-inch inner diameter and 3/32-inch wall thickness), just a little longer than the deck was thick. I taped the underside of the deck holes to keep the forthcoming epoxy from oozing below and for the tubes to bottom out. Then, I fastened the screws to the plates with nuts, achieving two things: It rigidly lined the screws where they needed to be, and the nuts on the underside would help avoid inadvertently epoxying the plates to the deck. (Been there, done that.)
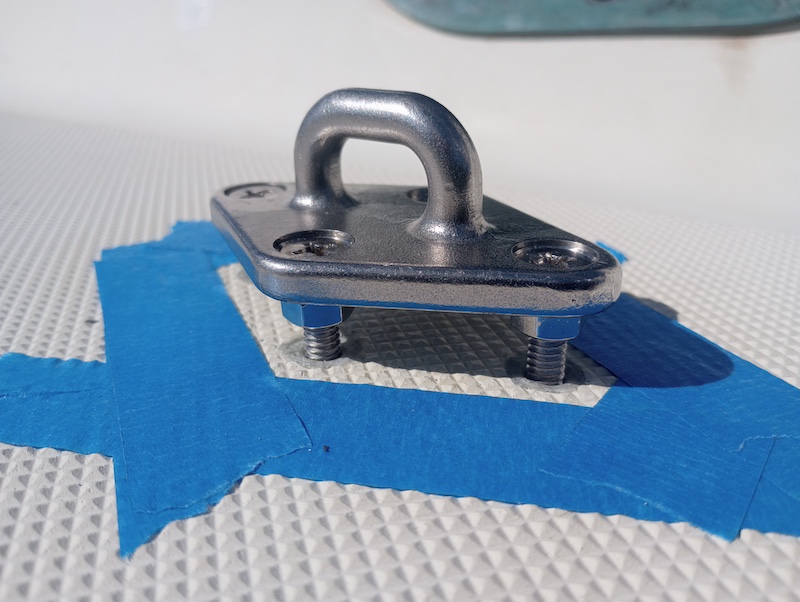
Using thickened epoxy, I coated the deck holes’ walls and the sleeves’ exteriors and gently inserted the sleeves into the holes. The hollow tubes had the advantage of letting potentially trapped air escape. I carefully put the diamond plate with the attached screws into the holes. (Yes, I dry-fit them first. Remember the best practices.) There was enough wiggle room for the sleeves to adjust placement but not so much as to draw in air or create voids. Epoxy oozed out on top, and some got inside the sleeves. Both were desirable to confirm thorough coverage and no trapped air. When it cured enough to set the sleeves, I gently removed the diamond plate so I could still clean up the epoxy with a cloth and acetone, from both the deck and screws.
Once the epoxy was fully cured, I used a Dremel tool with a grinding bit to remove the top of the sleeves (remember, I cut them a little long) and extra epoxy. I shaped the tops of the sleeves with a down-and-in bevel so later, when I attached the plates, the sealant would compress around the fastener. It was quick work to drive a 1/4-inch drill bit through the inside of the sleeves to clean out any epoxy. With the fasteners tightened, the tubes’ strength prevented deck compression.

Best practices include (but are not limited to) proper cleaning, drilling, thickener, backing plates, safety, sealant choices, and taping. The Resourceful Sailor encourages any do-it-yourselfer to review multiple sources when attempting a new-to-them project. Each source will approach a job differently, with ranging variances and circumstances. Arm yourself with as much information as possible to prepare for success. It is a boat, after all. Projects such as this can be very satisfying when you have the confidence of a job well done.
I recall my first epoxy jobs. They weren’t good. But I improved as I read more and gained more experience and confidence. Epoxy is a remarkable product. I went through the Northwest Passage on Breskell, a 50-ft cold-molded sloop built and captained by Olivier Huin. I called him the epoxy king. He ordered it by the barrels to build Breskell. During the passage, I witnessed many fixes, temporary and permanent, with it. Remember, keep your solutions safe and prudent, and have a blast.
To find out how The Resourceful Sailor’s DIY solutions hold up at sea, check out his presentation “Sailing With Josh & The Resourceful Sailor: A Flicka 20’s Pacific Odyssey” in Port Townsend on March 12. More here.